


Installing a built-in BBQ fryer at home is one of the smartest upgrades for anyone in Pakistan who loves outdoor-style BBQ but wants the convenience of an indoor setup. Whether you’re renovating your Karachi kitchen or designing a modern cooking station in a new home, knowing how to install built-in BBQ fryer safely can save you from future repairs, performance issues, and even safety hazards. Here, we also include a brief fryer installation guide to support your understanding.
This guide will help you understand the installation requirements clearly, so your built-in BBQ fryer performs at its best from day one. And if you are looking for reliable appliances designed for Pakistani kitchens, Xpert Appliances offers durable built-in BBQ fryers you can trust.
Pre-Installation Requirements of fryer
Before you begin installing built-in BBQ fryer , it’s important to make sure your kitchen or indoor BBQ area meets the basic requirements. In Pakistan, many kitchens are compact, and ventilation can be limited, so taking these steps early helps you avoid heat buildup and electrical stress.This section also covers the pre installation requirements of fryer to ensure safe and proper setup.
✔ Measure Your Space Properly
Most people worry about one common thing: “Will the fryer fit?”
That’s why precise measurements matter.
A built-in BBQ fryer requires:
- Countertop depth: 22–25 inches
- Width: 18–36 inches (depending on model)
- Ventilation clearance: 6 inches minimum
To avoid fitting problems, accurate space measurement for BBQ is essential.
In Pakistani homes, especially Karachi apartments, kitchens often have tight spaces and non-standard countertop sizes. Because of this, taking accurate measurements helps you avoid cutting too much or too little from your counter. If you’re buying from Xpert Appliances, each unit comes with an installation guide that includes exact cut-out diagrams and minimum clearance requirements.
✔ Check Your Ventilation Setup
Indoor BBQ setups in Pakistan can produce a good amount of smoke and heat, especially during frying. Without proper ventilation, your kitchen can become greasy and humid quickly.
Make sure you have:
- A functioning exhaust hood
- Proper airflow from a window or duct
- Heat-safe surroundings
If your kitchen lacks ventilation, consider investing in an exhaust hood before built-in appliance installation. It keeps your kitchen clean and improves appliance life.
✔ Review Electrical Requirements
Built-in fryers need stable electrical support because they draw high power.
Most require:
- 220–240V power supply
- A dedicated circuit
- Proper earth wiring
In older homes, wiring can be weak or overloaded, which poses a risk. It’s a good idea to have an electrician check your load capacity before installation. This reduces the chances of tripping, overheating, or short circuits.
Step-by-Step Installation
With the right preparation, built-in BBQ fryer installation becomes much easier Even if you hire a professional, knowing the steps protects you from poor-quality installation or shortcuts that technicians sometimes take.
Space and Placement Tips
Placement is one of the most important parts of installation. A poorly placed fryer may work fine at first but will eventually cause heat damage, instability, or even electrical issues.
✔ Choose a Heat-Safe Area
Keep the fryer away from:
- Wooden cabinets
- Fridges
- Plastic shelves
- Gas stoves
Instead, install on:
- Marble or granite
- Stainless steel counters
- Heat-resistant BBQ stations
These surfaces handle heat better and reduce the risk of surface damage.
✔ Allow Adequate Clearance
Built-in appliances need room to breathe.
Leaving 2–3 inches of space behind and 4–6 inches on the sides allows airflow, keeps wiring cool, and improves the fryer’s life.
✔ Cut the Countertop Accurately
When cutting the countertop:
- Follow the cut-out diagram provided
- Double-check measurements before cutting
- Use professional carpenters if needed
A wrong cut means permanent damage to your countertop. If your fryer is from Xpert Appliances, you get a complete cut-out guide that helps carpenters make precise cuts without guesswork.
Electrical Connection Guide
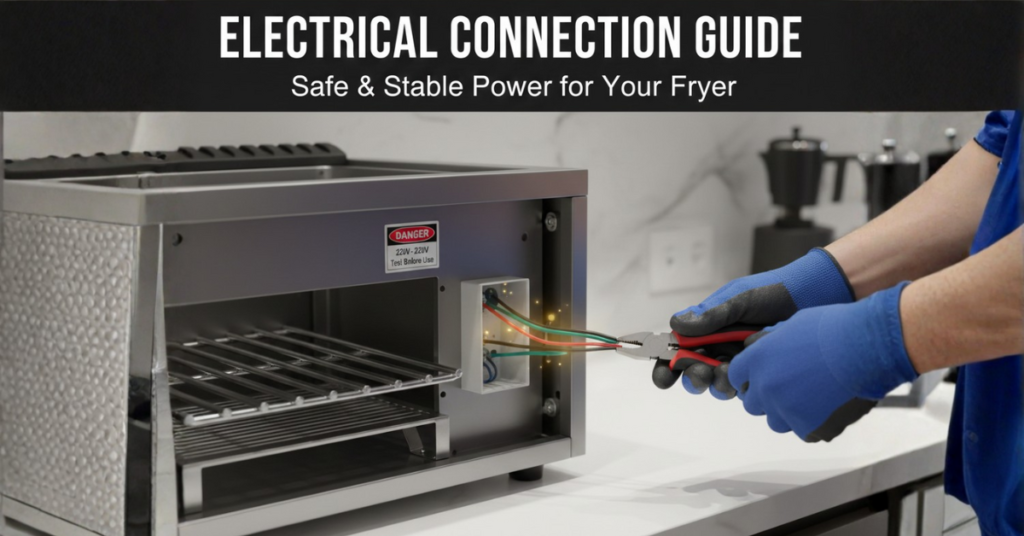
Electrical connections are the backbone of any built-in appliance. Even if the installation looks perfect, poor wiring can lead to malfunction or safety hazards.
✔ Ensure Proper Load Handling
Built-in fryers require high wattage (1500–3000W). Connecting them to weak wiring or shared circuits causes:
- Breaker trips
- Low heating performance
- Potential fire risks
✔ Step-by-Step Electrical Installation
- Turn off the breaker.
- Connect the wire to a dedicated 220V outlet.
- Securely tighten all terminals.
- Test the connection before placing the appliance fully inside the cut-out.
- Make sure earth wire is properly connected.
If you’re not confident, always call a certified electrician, especially in older houses where wiring may not support modern appliances.
Safety Precautions During Installation
Safety is critical when dealing with electrical appliances and heat-producing equipment. Following these steps ensures your installation is not just functional but also safe for long-term use.
Safety Tips You Must Follow
- Keep water sources away to avoid electrical hazards.
- Ensure proper ventilation to prevent smoke buildup.
- Use heat-resistant gloves during initial testing.
- Do not install the fryer near gas lines.
- Double-check all screws and counter placements before turning on the appliance.
- Test at low temperature first before full use.
Following these precautions keeps your kitchen safe and prevents unnecessary future repairs.
Conclusion
Installing a built-in BBQ fryer is a great way to elevate your cooking experience, especially for families in Pakistan who love hosting dawats, BBQ nights, or quick fried snacks. When you understand how to install built-in BBQ fryer systems properly, with accurate measurements, proper planning, and safe electrical work—you ensure long-term performance and avoid future issues.
If you want a reliable built-in BBQ fryer designed for Pakistani kitchens, explore Xpert Appliances, where each model offers durability, safety features, and easy installation support.
FAQs
- How to install built-in BBQ fryer?
You measure the space, cut the countertop to the required size, place the fryer securely, and connect it to a stable 220V electric outlet.
- Can I install it myself?
Basic placement is possible, but electrical work is risky. It’s better to hire a professional electrician.
- How much space do I need?
Most models require 22–25 inches of countertop depth and 18–36 inches width.
- Are electrical connections difficult?
Not necessarily, but they require stability and proper load support—so professional help is recommended.
- What safety precautions should I take?
Maintain ventilation, avoid water contact, ensure proper wiring, and keep heat-sensitive items away from the fryer.